Pages

Wednesday, April 20, 2011

Ben & Kristen's cutting board PART 2


These are a couple of the tools that we use in the machine shop a dial indicator and the Mighty Mag. This set up will allow me to adjust the planer by one thousandth of an inch. One thousandth is not to realistic but ten thousandths sure is. This set up works really well when combined with calipers, since your tape measure can’t measure this fine.


Here is a zoomed out view of the set up. You can see how this works much better than the measuring tape on the actual machine. I also decided to cut a few new pieces of walnut after attempting to use epoxy to fix the cracks. I decided on this because the epoxy I used cured to fast and was to thick. I didn’t feel it was penetrating all the way into the crack. This would have left voids in the wood when cut and rotated to the end grain. I feel this was a much safer decision. The risk of gluing all the pieces up and finding out it didn’t turn out how I wanted was not worth it, plus I had the extra walnut.

Here are all the finished pieces. I ran all the pieces through the planer one last time. Doing this gave me a more uniformed finish and size compared to the planed full width boards.

Getting ready for a glue up.

I put a sheet of wax paper on my clamps before I actually applied the glue. I did this to help prevent the squeeze out from drying on my clamps.

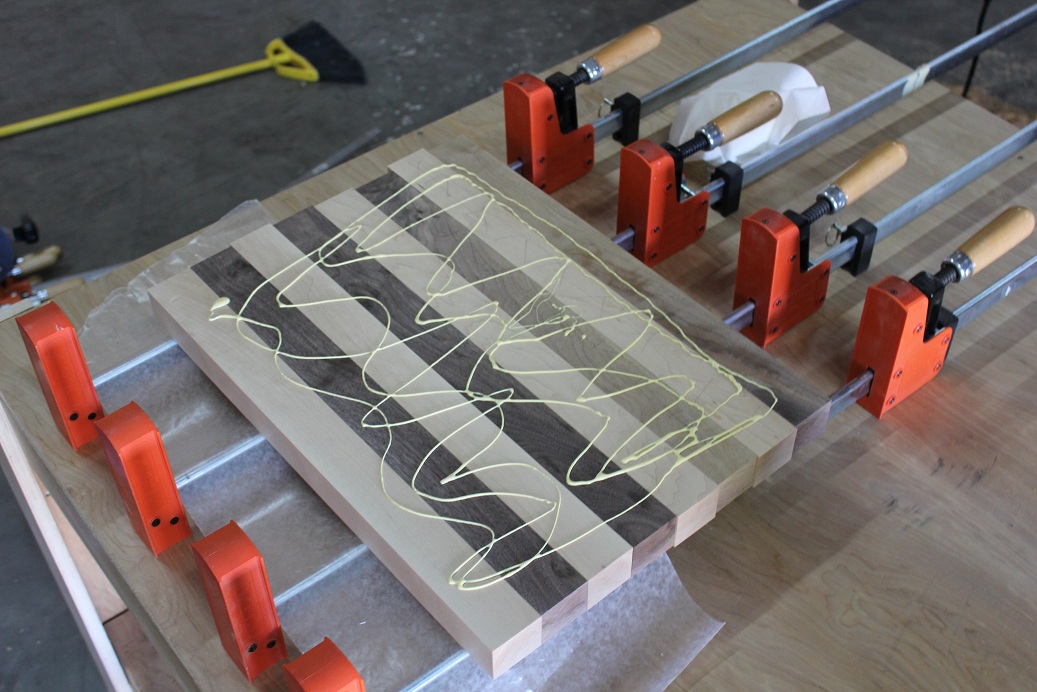
Glue is on all I need to do is use a ink roller to spread it and we will be all glued up.

A few clamps anyone? Still need to get my glue ups down, glue seems to allways dry a little faster than you want. I was able to still get done before it was to dry but pre planning is the key to a good glue up.

Monday, April 11, 2011

Ben & Kristen's cutting board

I finally started working on my brother-in-laws wedding present today. He requested a custom made cutting board from my wife and she said, “where the heck am I going to get that.” To which he replied, “Anthony, duh.” It took Laura a couple of seconds to realize what he was talking about and said, “Oooooooh!”. This is funny because that’s one of the gifts she got for Christmas.
Laura's maple and padauk cutting board
I have made a rendering of what I want the cutting board to look like.
First I start by by modeling a single block on my cad system. I change the shading to the type of wood that I want it to resemble.
Then I save a new file as a new name and change the shading again to resemble the other wood that I will be using.
Now for the cool part, I start a new file as an assembly and insert both blocks, add a few mates and you start to have a cool looking strip of wood. Once this is done I save a new assembly, create a few more mates and do a liner pattern. The end result is what you see above.
This is the lumber that I started with. It is 8/4 hard maple and 8/4 walnut. This lumber is just under 6 inches wide. I forgot to take pictures before I cut the boards to 21 in long I believe the rough lumber was about 6 to 8 feet long.
This is a view from the end of the rough lumber. The one piece of walnut you can see a crack. I plan on using some epoxy to stabilize the wood.
I already trued up the lumber in the jointer and now I am running it through the planner. When I plane my lumber to thickness. I find using calipers much easier to make sure it is the correct thickness.
This is the planed walnut I really enjoy the color, smell and texture of this wood.
Lumber before I cut it into strips. I like to mark the side that I run against the fence and the side that runs down on the table.
Lumber after I have started cutting it into the strips 1.750 X 2.0 X 21.0.
All the pieces are cut. Before I do my glue up I have to address the crack in the walnut piece epoxy will work quiet well.